How we integrate Google Maps or Mapbox Maps in your web, native mobile app or project.
If you need your web, Android app or iOS app integrate with a map, geo-location services, extensible, custom maps, location search there are many solutions. For the developer side there are solutions like Google Maps, Mapbox, Open Street Maps and more.
In Bouncing Shield, our preferred choice is MapboxGL. MaboxGL provides an SDK for React Native, but also for web apps as does Google Maps. You can view our article about integrating Google Maps in React Native here
In this article I’m going to explain how we integrate MapboxGL in you ReactNative project.
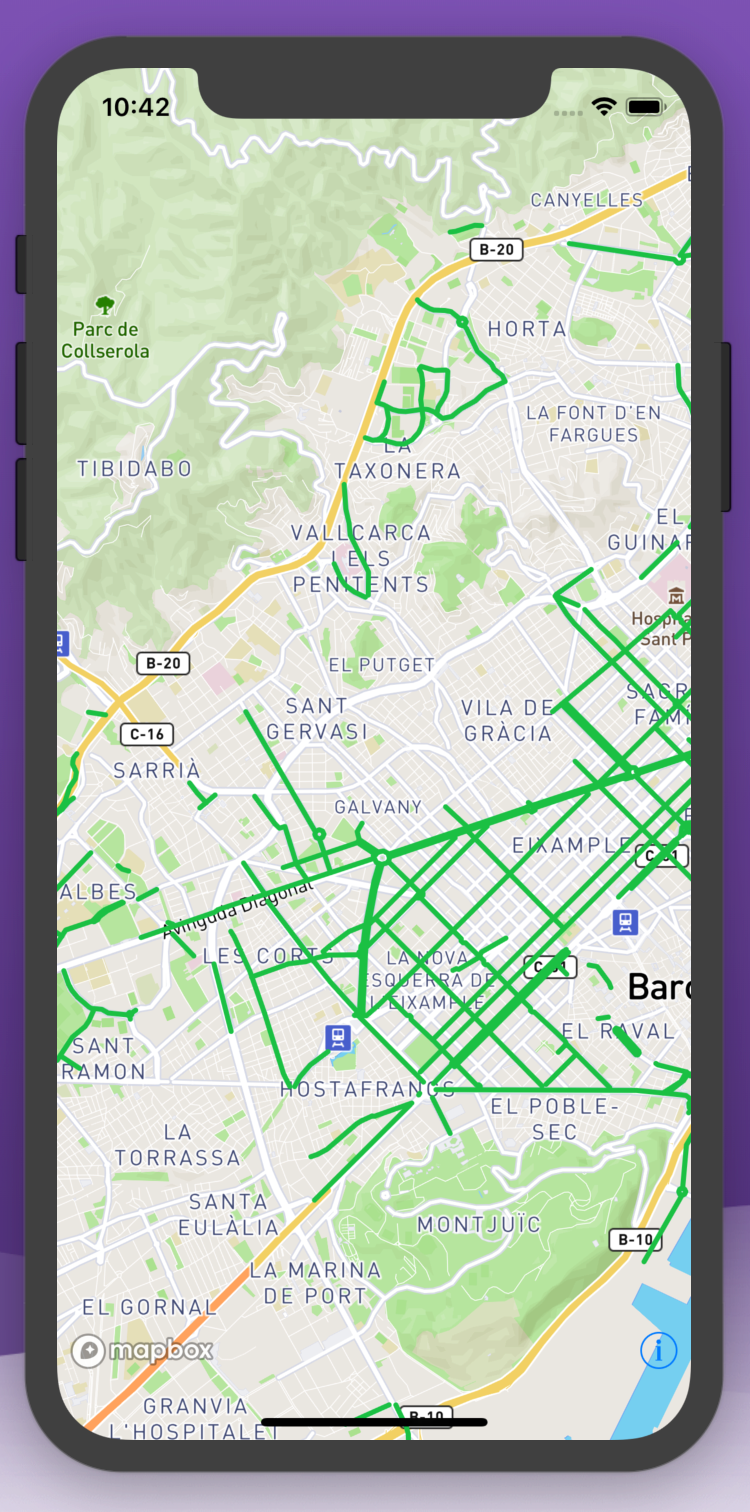
We are developing a custom bike lane apps for Barcelona city, BcnByBike. The client needed a native app that can show a map of the city of Barcelona, in that map we need to display the public city bike lanes. And the lanes come from the public Open Data Barcelona city information in a json format.
The easier way to add Mapbox SDK to your project is following the steps in the GitHub repository, but we have found the manual install a better option.
npm install @mapbox/react-native-mapbox-gl --saveInstructions for IOS
Add Native Mapbox SDK Framework
In the Project navigator. Click General tab then add node_modules/@mapbox/react-native-mapbox-gl/ios/Mapbox.framework to Embedded Binaries.
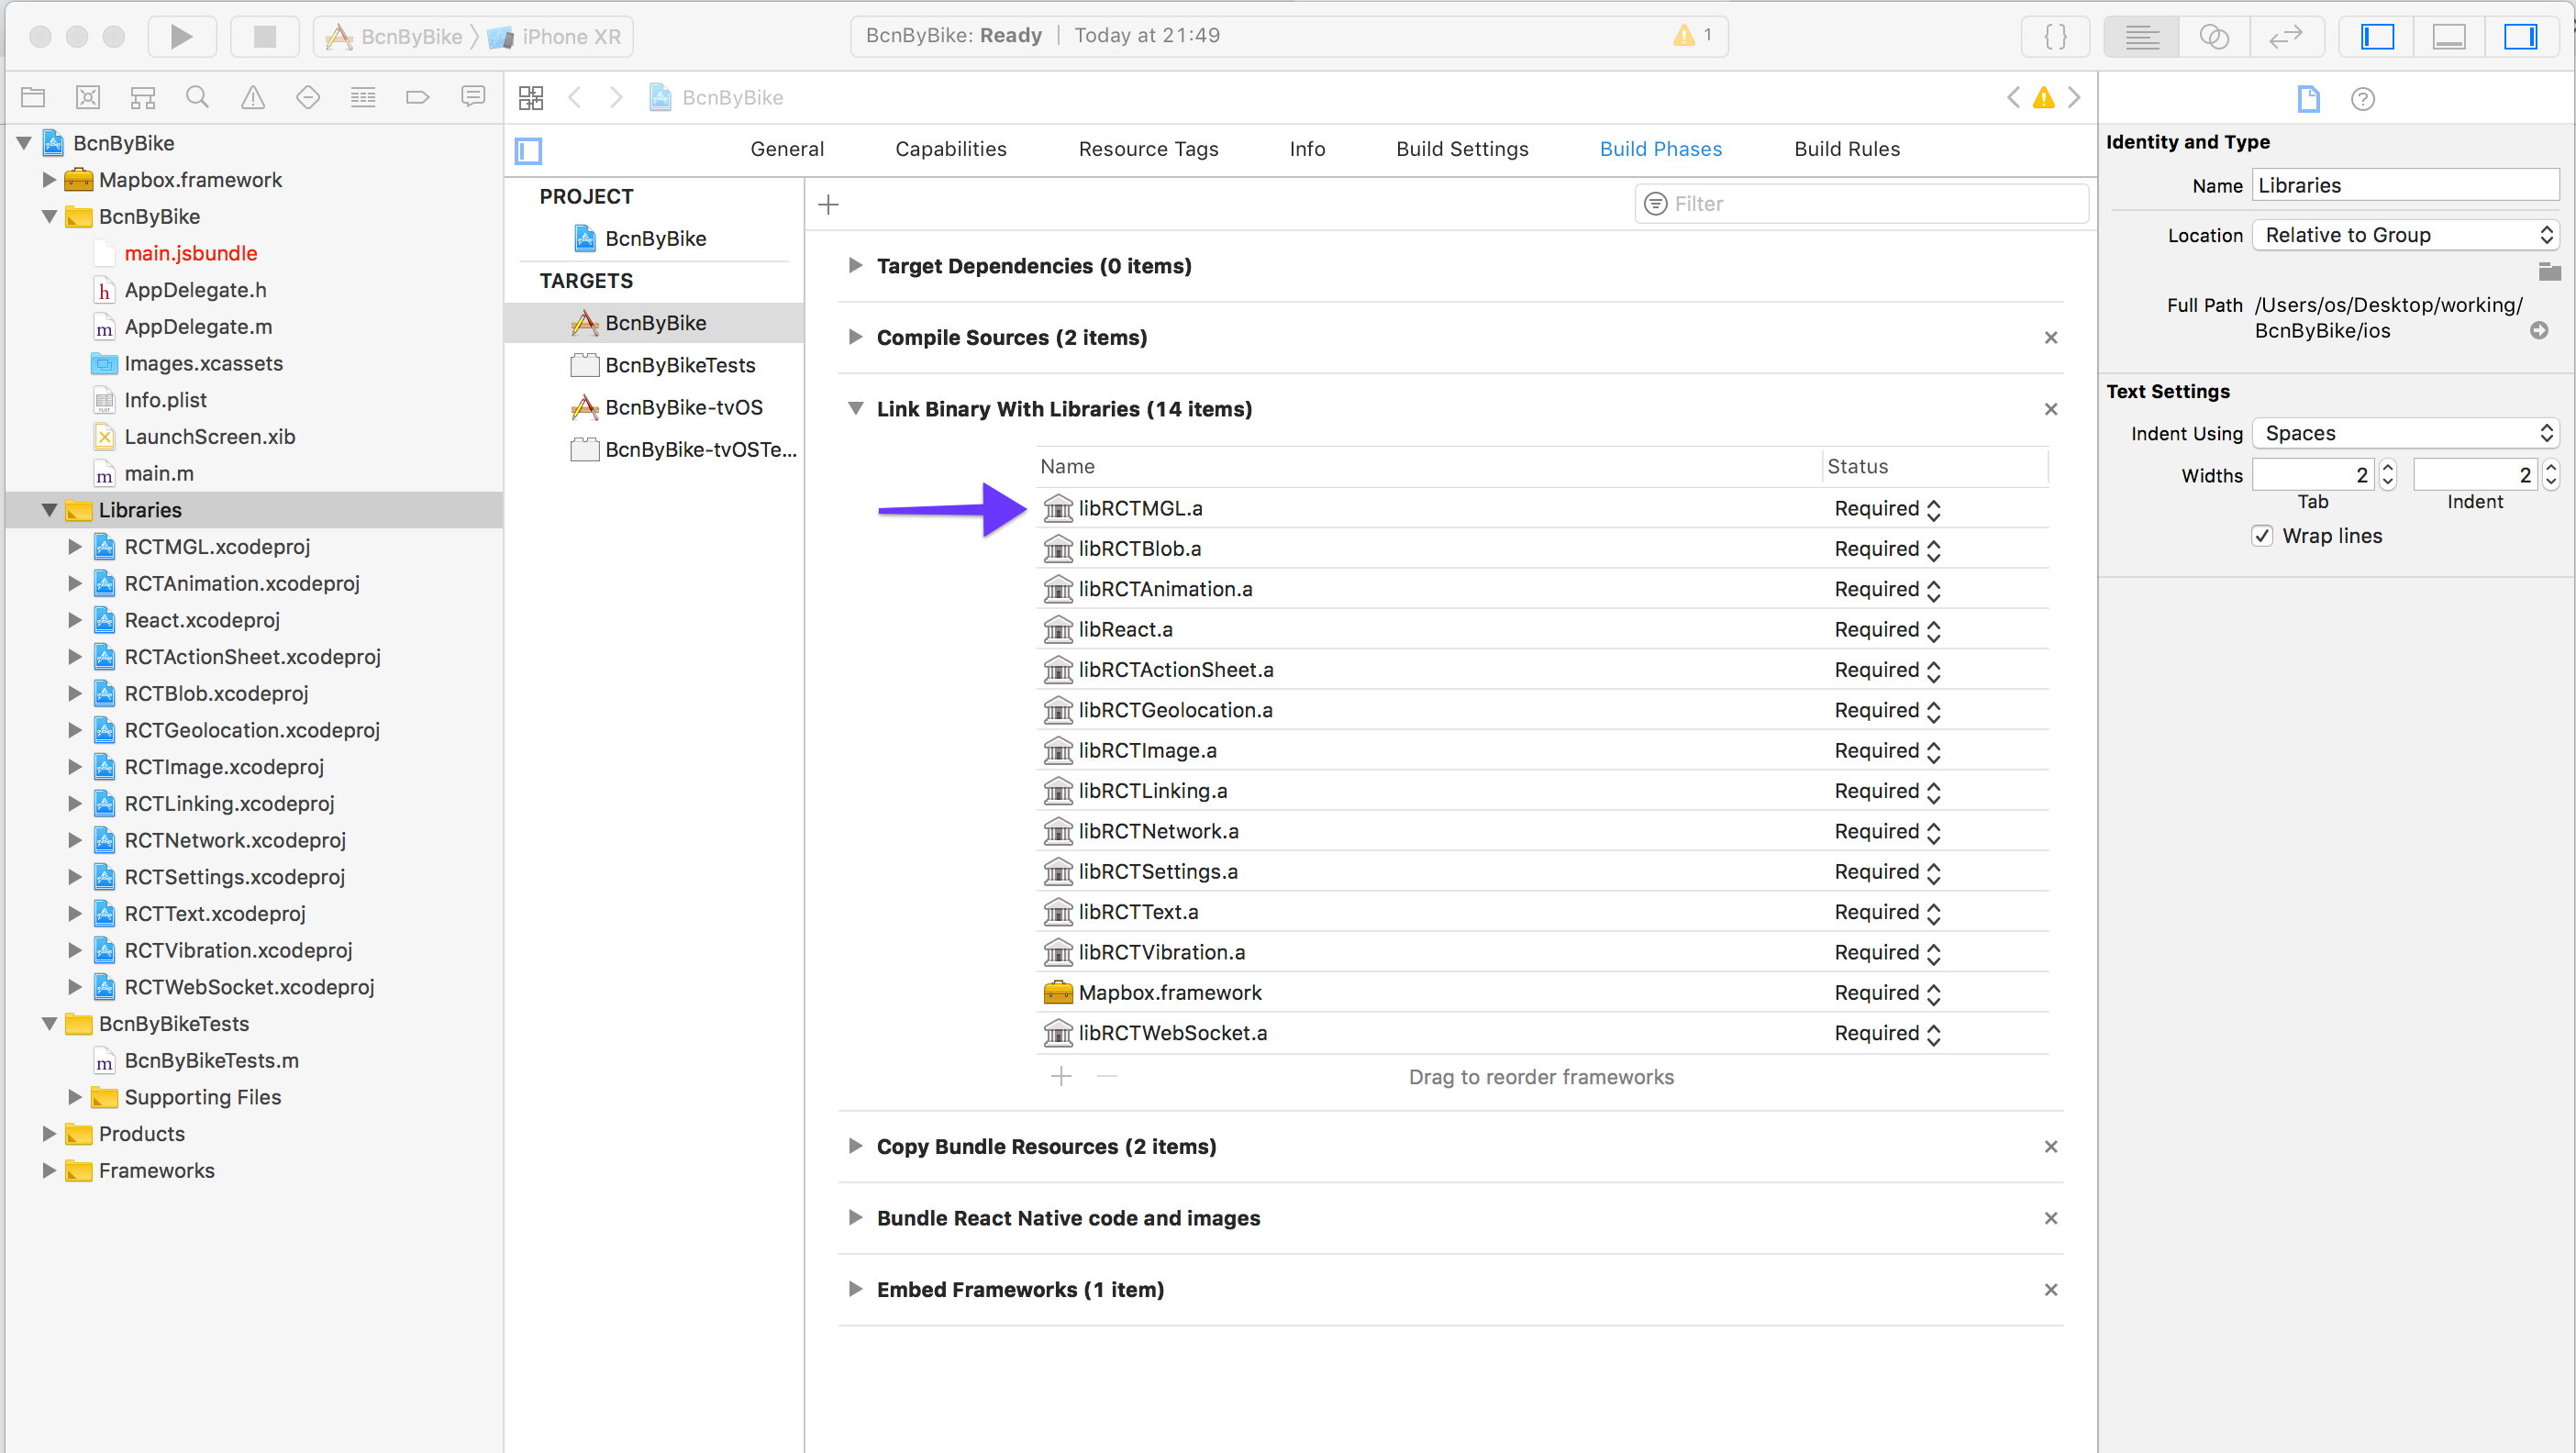
Add React Native Mapbox SDK Files
In the Xcode’s Project navigator, right click on the Libraries folder ➜ Add Files to <…>. Add
node_modules/@mapbox/react-native-mapbox-gl/ios/RCTMGL.xcodeprojThen in Xcode navigate to Build Phases click on it and you should see Link Binary with Libraries, we need to add libRCTMGL.a
Add Framework Header Search Paths
In the Build Settings of your application target search for FRAMEWORK_SEARCH_PATHS.
Add non-recursive to your Framework Search Paths
$(PROJECT_DIR)/../node_modules/@mapbox/react-native-mapbox-gl/ios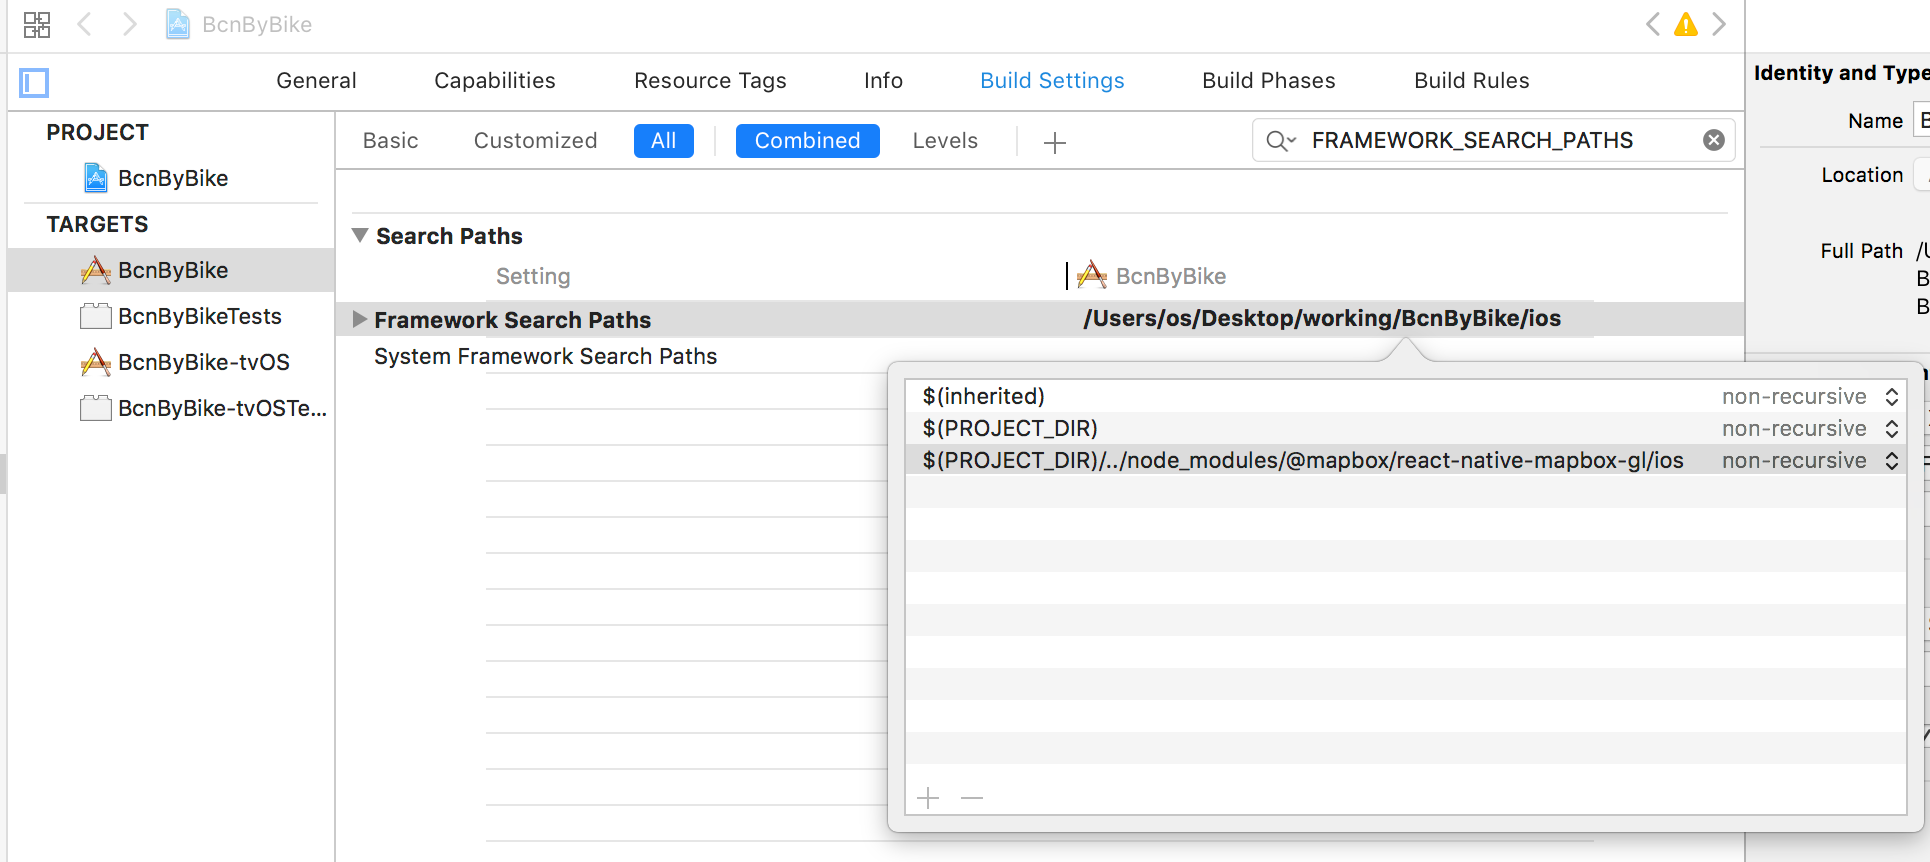
Add Run Script
In the Build Phases tab, click the plus sign and then New Run Script Phase
Add Mapbox Component to React Native app
First, you’ll import the components that you will need. This includes components from React, React Native, and Mapbox. To display a map you’ll need a Mapbox access token. Mapbox uses access tokens to associate requests to API resources with your account. As soon as you have imported Mapbox, you should set your Mapbox access token using Mapbox.setAccessToken().
Add the import for the Component and configure your access token
import Mapbox from '@mapbox/react-native-mapbox-gl';
Mapbox.setAccessToken('<your access token here>');
Then add the code to include the component in a View element, remember that the container view has to have a style of flex: 1 for it to cover the complete screen
Instructions for Android
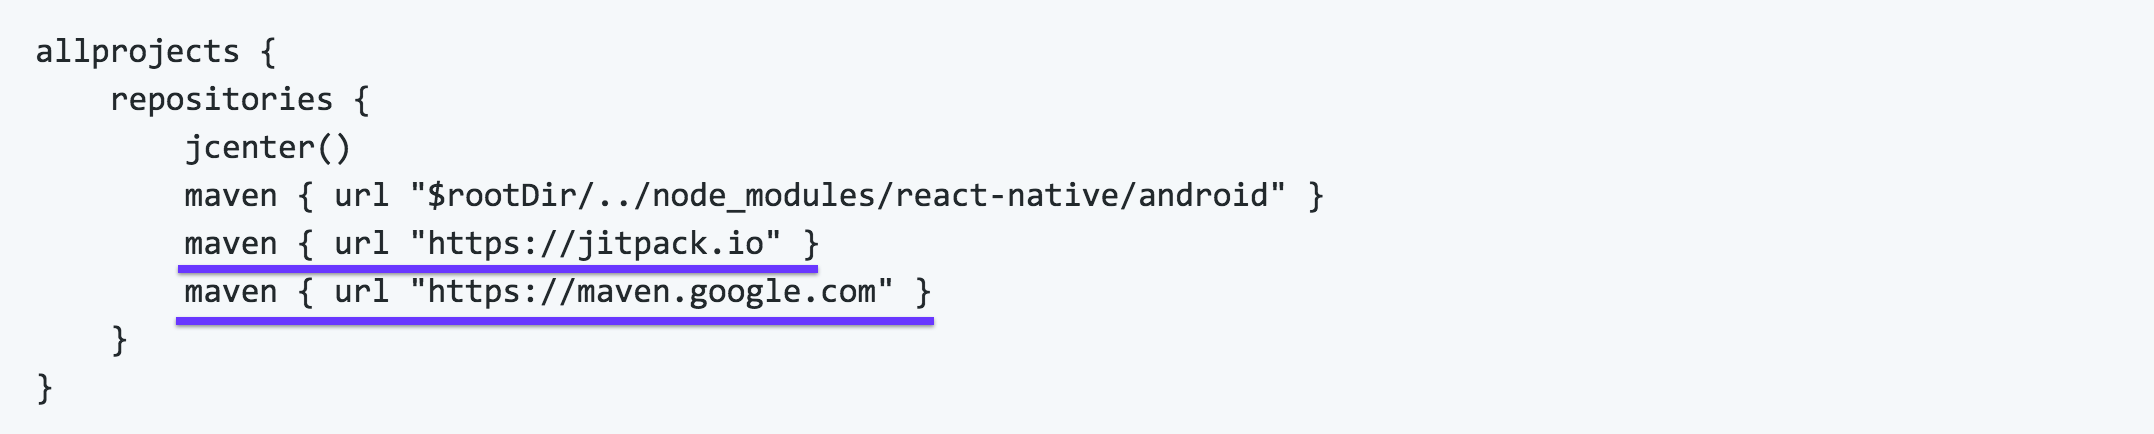
We need to add some repositories in order to get our dependencies.
In project:build.gradle
In app:build.gradle. Add project under dependencies

In settings.gradle Include project, so gradle knows where to find the project
include ':mapbox-react-native-mapbox-gl'
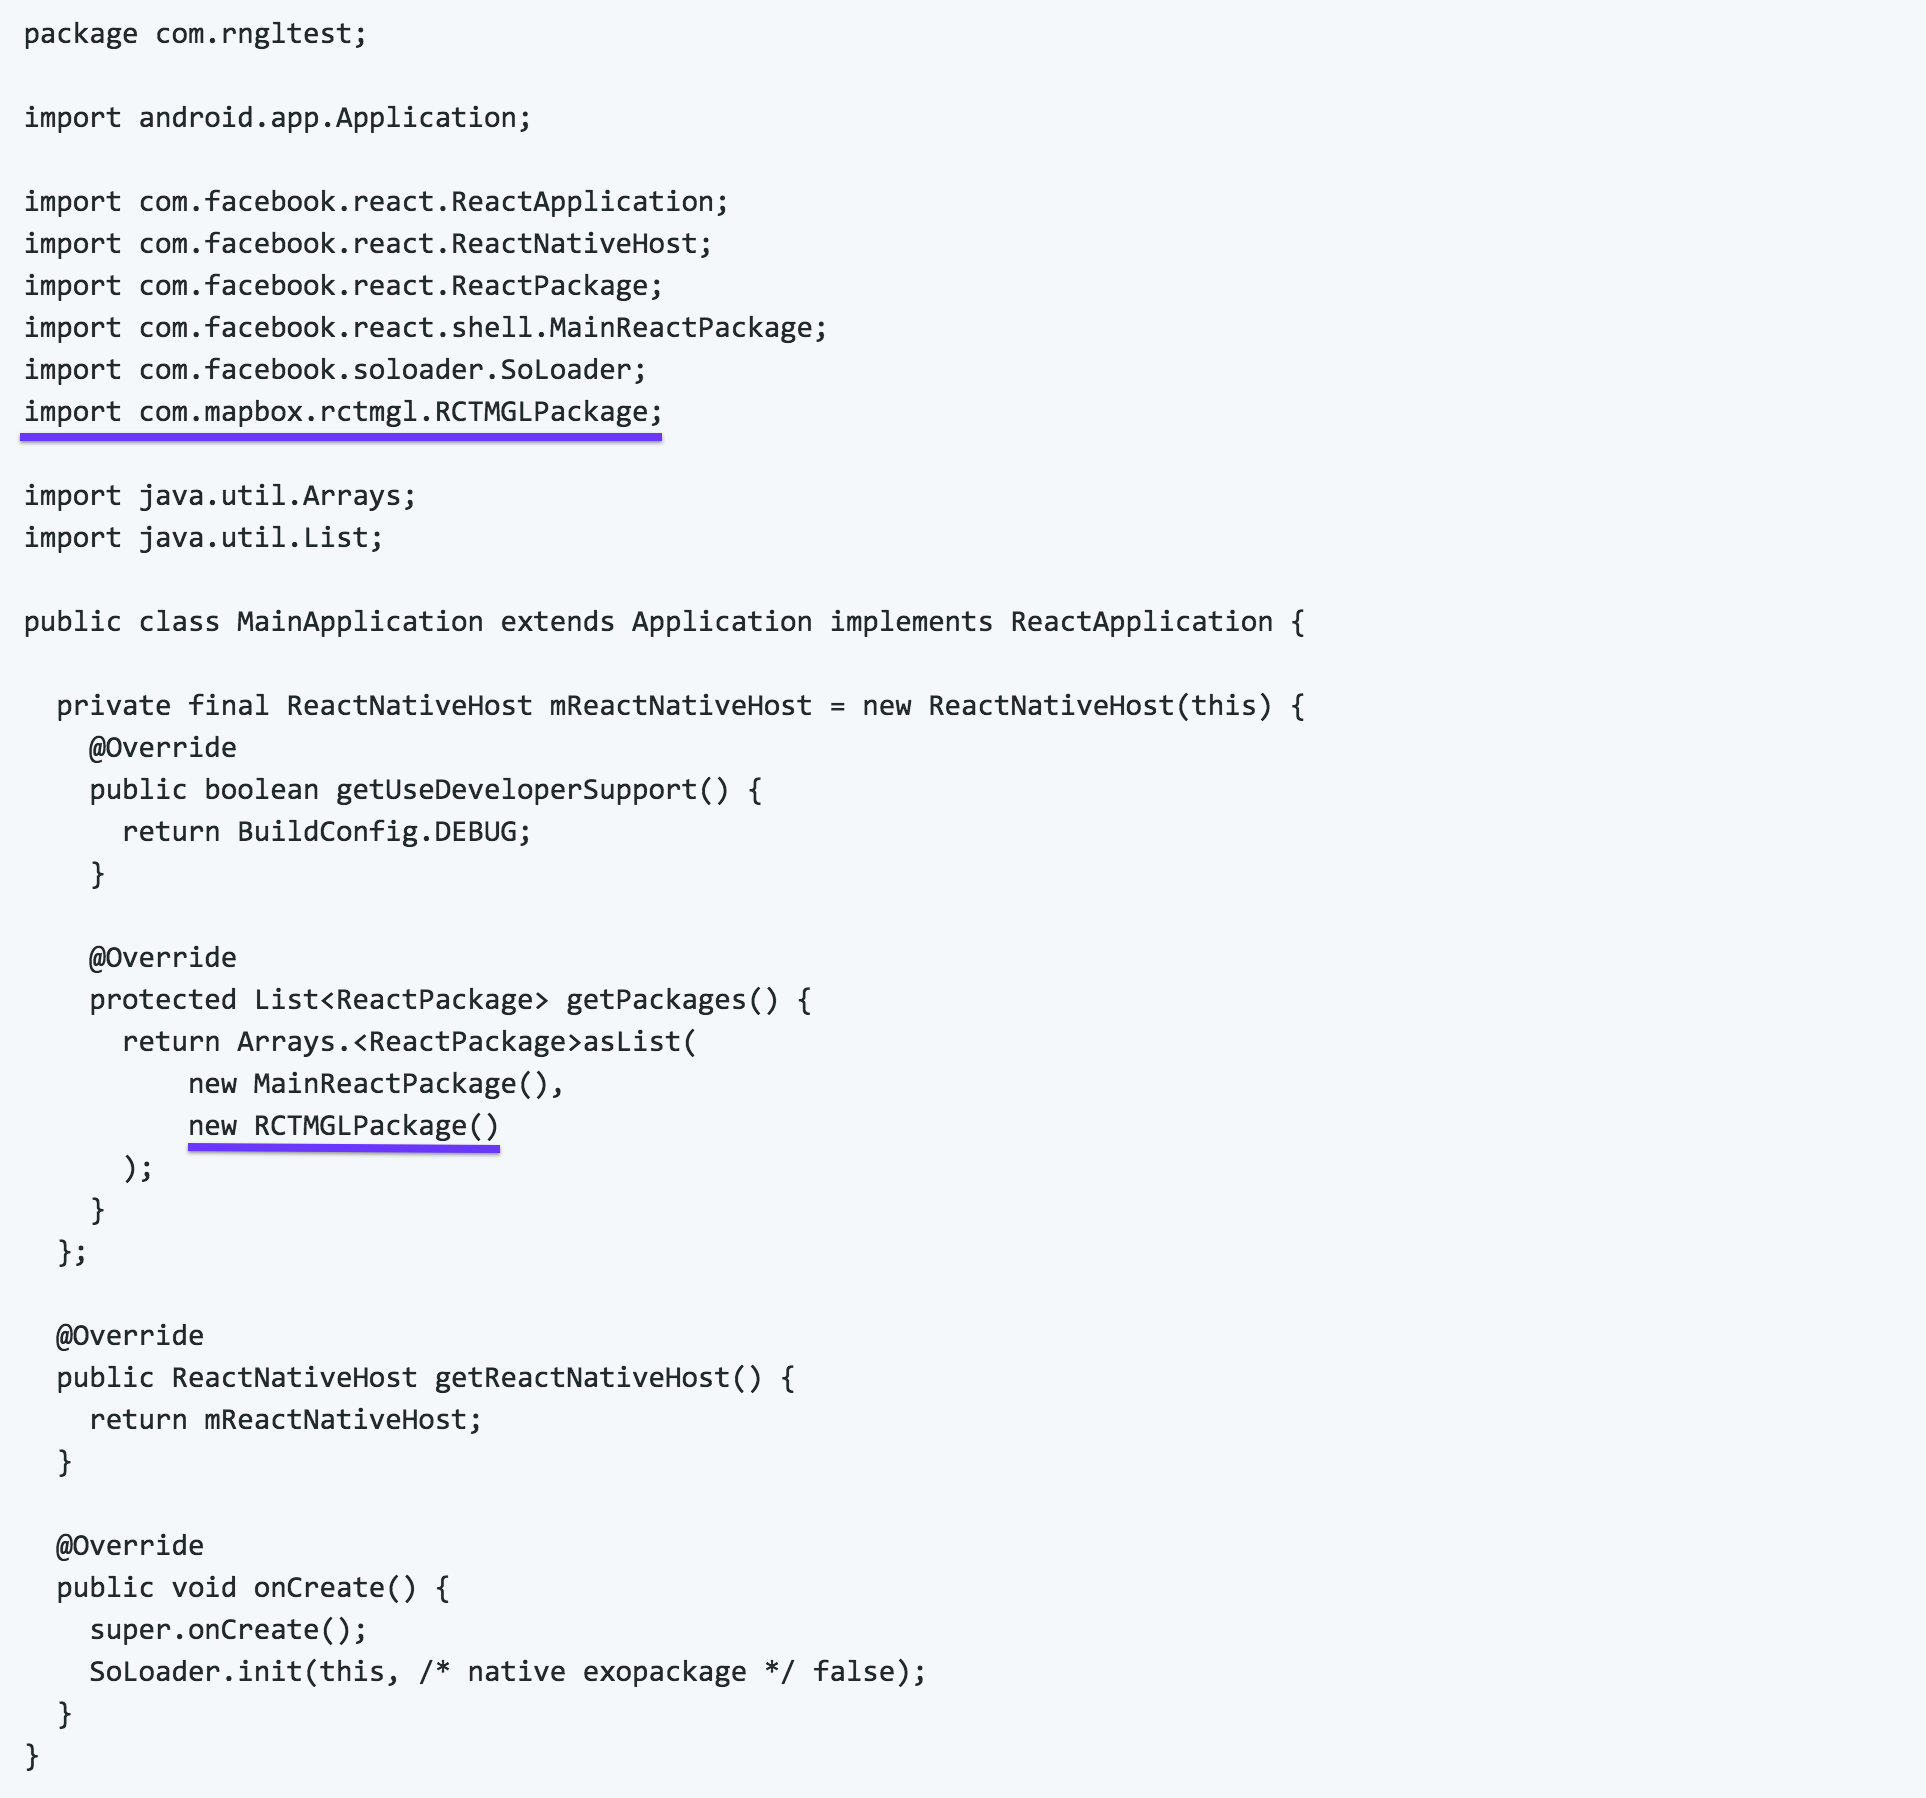
project(':mapbox-react-native-mapbox-gl').projectDir = new File(rootProject.projectDir, '../node_modules/@mapbox/react-native-mapbox-gl/android/rctmgl')In MainApplication.java Add import com.mapbox.rctmgl.RCTMGLPackage; as an import statement and new RCTMGLPackage() in getPackages()
Possible errors
If you get an error like this: No static method toHumanReadableAscii The solution is to edit the compile in build.gradle to this:
compile (project(':mapbox-react-native-mapbox-gl')) {
compile ('com.squareup.okhttp3:okhttp:3.6.0') {
force = true
}
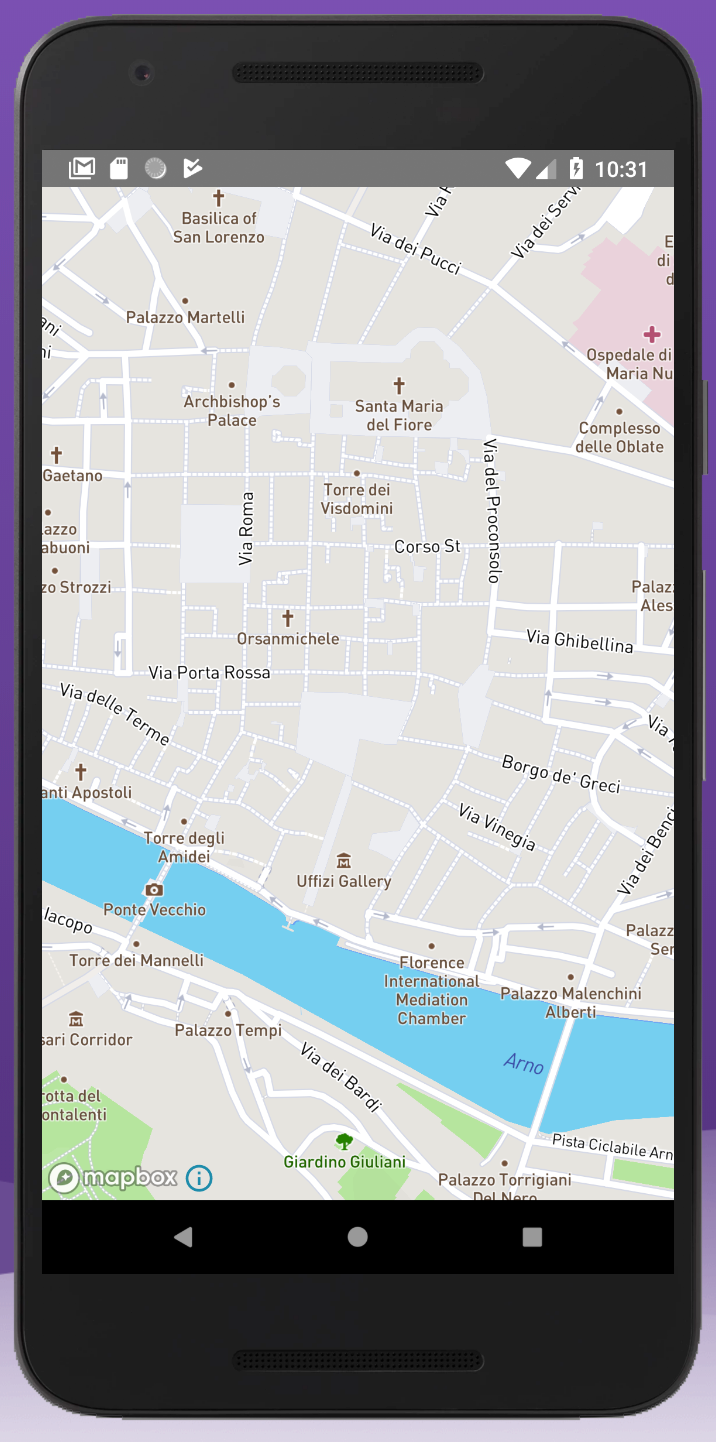
}The Android app will look like this
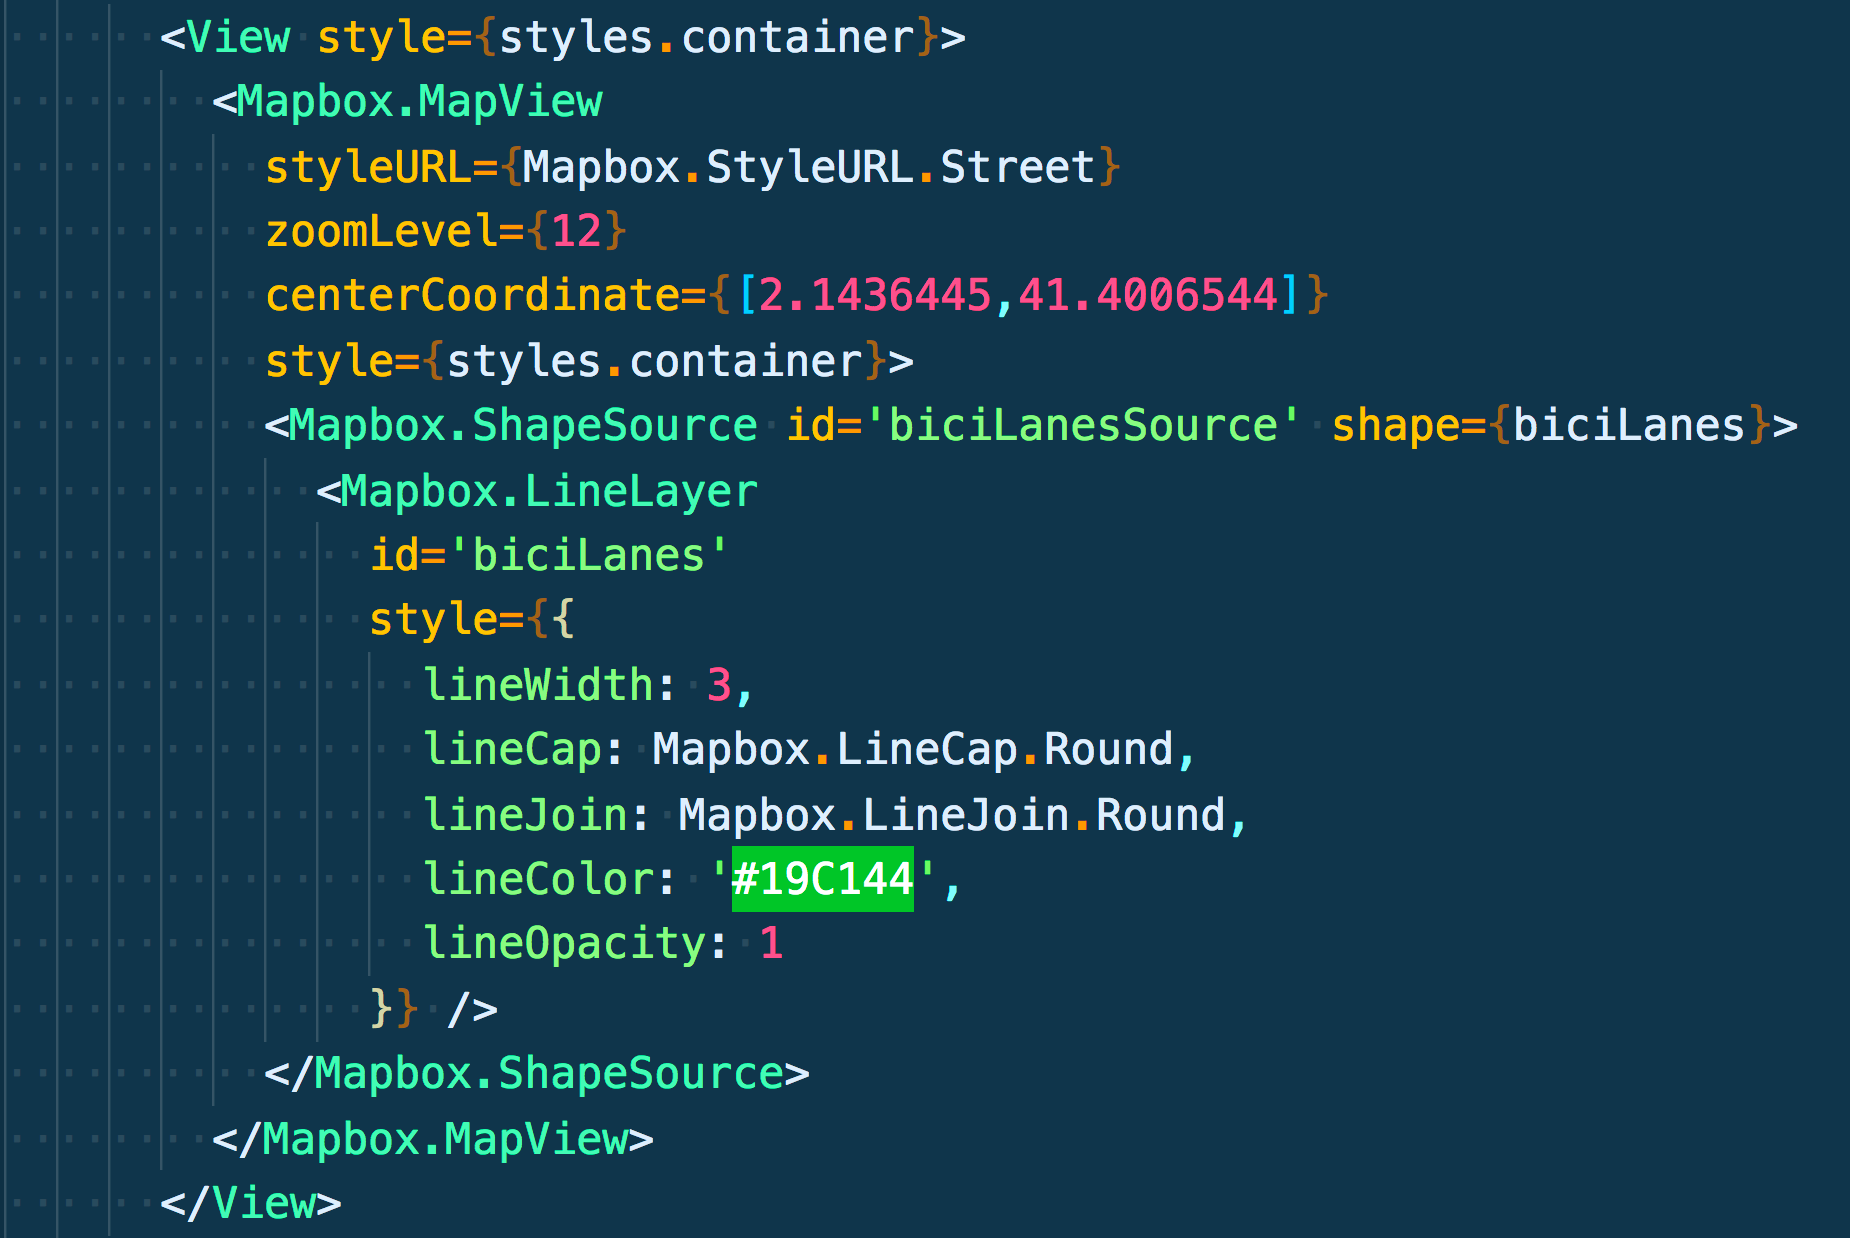
Showing bike lanes on the map
import your line data into a variable
import biciLanes from 'carril_bici.js'Add the ShapeSource and LineLayer Mapbox Components
<Mapbox.ShapeSource id='biciLanesSource' shape={biciLanes}>
  <Mapbox.LineLayer
    id='biciLanes'
    style= />
</Mapbox.ShapeSource>
The complete code is like this:
The Map View after this, is like this: