
React Native OCR Scanner Card2Contact
This is a demo study app for making an ocr scanner for business cards and store the info in the contacts list of the phone. In this case I will only target iOS system but this can be done for Android also. I’m calling this app Card2Contact and this is part of Bouncing Shield Explorations
The main packages we will need are the one for reading images form the camera (react-native-camera)
Creating base React Native App
react-native init Card2Contact
Install dependencies
yarn add react-native-camera --save
Configure react-native-camera package
react-native link react-native-camera
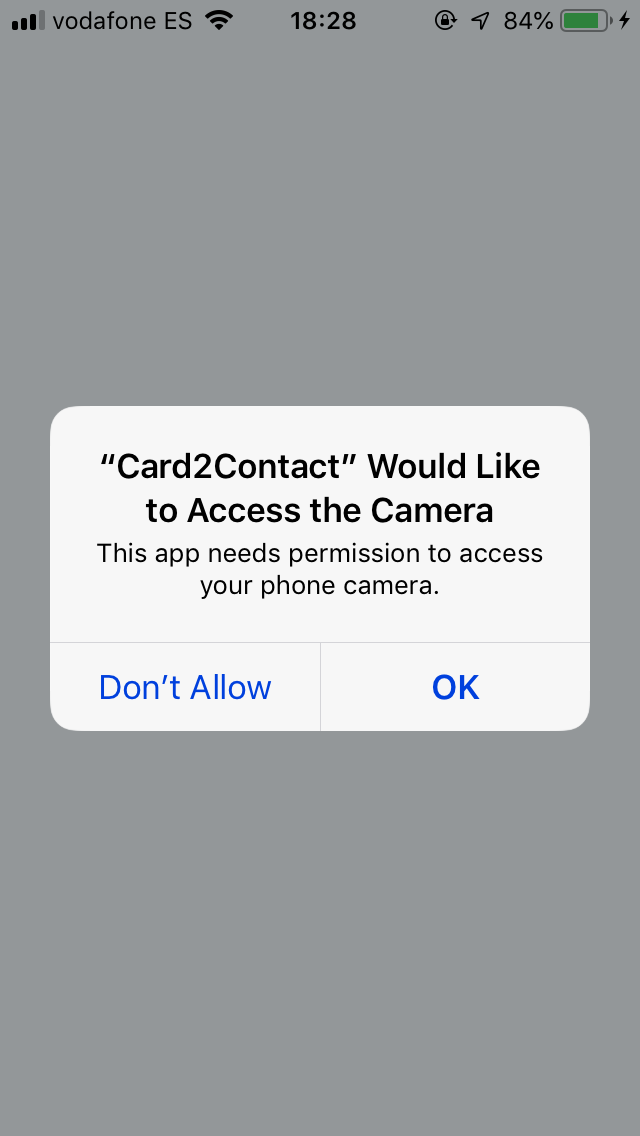
For iOS we have to set the permissions. In the Info.plist file add the description for NSCameraUsageDescription key. It is required by Apple and it says why you need to access the camera. You also need NSPhotoLibraryUsageDescription key to store the picture in the phone library.
  <key>NSCameraUsageDescription</key>
  <string>This app needs permission to access your phone camera.</string>
  <key>NSPhotoLibraryUsageDescription</key>
  <string>This app store photos in your phone library.</string>
  <key>NSPhotoLibraryAddUsageDescription</key>
  <string>This app store photos in your phone library.</string>
Basic Camera Component Screen
  import React, {Component} from 'react';
  import {StyleSheet, Dimensions, Text, View} from 'react-native';
  import Camera from 'react-native-camera';

  export default class App extends Component<Props> {
    takePicture() {
      this.camera.capture()
        .then((data) => console.log(data))
        .catch(err => console.error(err));
    }

    render() {
      return (
        <View style={styles.container}>
          <Camera
            ref={cam => { this.camera = cam }}
            style={styles.preview}
            aspect={Camera.constants.Aspect.fill}>
              <Text style={styles.capture} onPress={this.takePicture.bind(this)}> [CAPTURE CARD]</Text>
          </Camera>
        </View>
      );
    }
  }

  const styles = StyleSheet.create({
    container: {
      flex: 1,
      justifyContent: 'center',
      alignItems: 'center',
      backgroundColor: '#F5FCFF',
    },
    preview: {
      flex: 1,
      justifyContent: 'flex-end',
      alignItems: 'center',
      height: Dimensions.get('window').height,
      width: Dimensions.get('window').width
    },
    capture: {
      flex: 0,
      backgroundColor: '#fff',
      borderRadius: 5,
      color: '#000',
      padding: 10,
      margin: 40
    }
  });

Add Navigation to show photo screen for processing
yarn add react-navigation --save
yarn add react-native-gesture-handler --save
react-native link react-native-gesture-handler
Re-organize code to add navigation
App.js
  import React, {Component} from 'react';
  import {StyleSheet, Dimensions, Text, View} from 'react-native';

  import CameraScreen from './src/screens/CameraScreen'
  import ContactScreen from './src/screens/ContactScreen'

  import {createStackNavigator, createAppContainer} from 'react-navigation';

  const AppNavigator = createStackNavigator({
    CameraScreen: {
      screen: CameraScreen
    },
    ContactScreen: {
      screen: ContactScreen
    }
  });

  const AppContainer = createAppContainer(AppNavigator);

  export default class App extends React.Component {
    render() {
      return <AppContainer />;
    }
  }
CameraScreen.js
  import React, { Component } from 'react';
  import { StyleSheet, Dimensions, Text, View } from 'react-native';
  import { RNCamera } from 'react-native-camera';

  export default class CameraScreen extends Component {
    takePicture = async function() {
      if (this.camera) {
        const options = { quality: 0.5, base64: true };
        const data = await this.camera.takePictureAsync(options)
        console.log(data.uri);
      }
    };

    render() {
      return (
        <View style={styles.container}>
          <RNCamera
            ref={cam => { this.camera = cam }}
            style={styles.preview}
            >
              <Text style={styles.capture} onPress={this.takePicture.bind(this)}> [CAPTURE CARD]</Text>
          </RNCamera>
        </View>
      );
    }
  }

  const styles = StyleSheet.create({
    container: {
      flex: 1,
      justifyContent: 'center',
      alignItems: 'center',
      backgroundColor: '#F5FCFF',
    },
    preview: {
      flex: 1,
      justifyContent: 'flex-end',
      alignItems: 'center',
      height: Dimensions.get('window').height,
      width: Dimensions.get('window').width
    },
    capture: {
      flex: 0,
      backgroundColor: '#fff',
      borderRadius: 5,
      color: '#000',
      padding: 10,
      margin: 40
    }
  });
ContactScreen.js
  import React, { Component } from 'react';
  import { StyleSheet, Text, View } from 'react-native';

  export default class ContactScreen extends Component {
    render() {
      return (
        <View style={styles.container}>
          <Text>ContactScreen</Text>
        </View>
      );
    }
  }

  const styles = StyleSheet.create({
    container: {
      flex: 1,
      justifyContent: 'center',
      alignItems: 'center',
      backgroundColor: '#F5FCFF',
    }
  });
Using Google Cloud Vision API to extract data from photo
Google has a great API for detecting text and extracting (OCR) that we can use for this purpose. For using this API you need to create a Google Cloud Platform (GCP) project
Go to the web page and create a new project

After that, go to your project and create an credential API to use in your React Native Project

Copy your API key and store it in a safe place

Lets add the Vision API for this project

Look for the Vision API and click ENABLE
Remember to enable Billing for the projects as it is REQUIRED
Code for detecting text
Lets modify the code in the CameraScreen.js file and add a new method to connect with Google Vision API.
The API endpoint for Google Vision is https://vision.googleapis.com/v1/images:annotate And you need to pass the key for authenticate.
CameraScreen.js
  takePicture = async function() {
    if (this.camera) {
      const options = { quality: 0.5, base64: true };
      const data = await this.camera.takePictureAsync(options)
      this.detectText(data.base64)
    }
  };

  detectText(base64){
    fetch("https://vision.googleapis.com/v1/images:annotate?key=" + "YOUR API KEY", {
        method: 'POST',
        body: JSON.stringify({
          "requests": [{
            "image": { "content": base64 },
            "features": [
                { "type": "TEXT_DETECTION" }
            ]}]
      })
    })
    .then(response => { return response.json()})
    .then(jsonRes => {
      let text = jsonRes.responses[0].fullTextAnnotation.text
      this.props.navigation.navigate('ContactScreen', { text: text })
    }).catch(err => {
      console.log('Error', err)
    })
  }
ConatctScreen.js
  import React, { Component } from 'react';
  import { StyleSheet, Text, View } from 'react-native';

  export default class ContactScreen extends Component {
    constructor(props){
      super(props)

      const { navigation } = this.props
      const text  = navigation.getParam('text')
      const lines = text.match(/[^\r\n]+/g)

      this.state = {
        text: text,
        lines: lines
      }

      console.log('text', text)
      console.log('lines', lines)
    }

    render() {
      return (
        <View style={styles.container}>
          <Text>ContactScreen</Text>
        </View>
      );
    }
  }

  const styles = StyleSheet.create({
    container: {
      flex: 1,
      justifyContent: 'center',
      alignItems: 'center',
      backgroundColor: '#F5FCFF',
    }
  });
Creating Contact View Form
Lets display the list of text returned by the Google API and along with it a form to choose the type of text to classify it for the contact.
npm install react-native-picker-select
And also add a button on the bottom to save the info.
  import React, { Component } from 'react';
  import { StyleSheet, Text, View, ScrollView, TouchableOpacity} from 'react-native';
  import RNPickerSelect from 'react-native-picker-select';

  export default class ContactScreen extends Component {
    static navigationOptions = {
      title: 'New Contact'
    }

    constructor(props){
      super(props)
      const { navigation } = this.props
      const text  = navigation.getParam('text')
      const lines = text.match(/[^\r\n]+/g)

      this.state = {
        text: text,
        lines: lines,
        contact: {
          familyName: null,
          givenName: null,
          phoneNumbers: [],
          emailAddresses: [],
          company: null
        },

        lineTypes: [
          {label: 'Last Name', value: 'familyName'},
          {label: 'First Name', value: 'givenName'},
          {label: 'Phone Number', value: 'phoneNumbers'},
          {label: 'Email Address', value: 'emailAddresses'},
          {label: 'Company', value: 'company'}
        ]
      }

      this.selectedType = this.selectedType.bind(this)
    }

    selectedType(type, value) {
      var updatedContact = Object.assign({}, this.state.contact)

      if (type == 'phoneNumbers') {
        updatedContact[type].push({label: "mobile", number: value.replace(/ /g,'')})
      } else if (type == 'emailAddresses'){
        updatedContact[type].push({label: "work", email: value.replace(/ /g,'')})
      } else {
        updatedContact[type] = value
      }

      this.setState({contact:updatedContact});
    }

    render() {
      console.log('state', this.state)
      return (
        <View style=>
          <ScrollView style={styles.container}>
            {
              this.state.lines.map((line, index) => {
                return (
                  <View style={styles.lineContainer} key={index}>
                    <Text style={styles.lineText}>{line}</Text>
                    <View style={styles.lineType}>
                      <RNPickerSelect
                        placeholder=
                        onValueChange={(type) => this.selectedType(type, line)}
                        items={this.state.lineTypes}
                        style={styles.picker}
                      />
                    </View>
                  </View>
                )
              })
            }
          </ScrollView>
          <TouchableOpacity
            style={styles.saveButton}
          >
            <Text>Save Contact</Text>
          </TouchableOpacity>
        </View>
      );
    }
  }

  const styles = StyleSheet.create({
    container: {
      flex: 1,
      backgroundColor: '#F5FCFF',
    },
    lineContainer: {
      flex: 1,
      borderColor: '#666666',
      borderWidth: 1,
      padding: 10
    },
    picker: {
      fontSize: 16,
      borderWidth: 1,
      borderColor: 'gray',
      borderRadius: 4,
      backgroundColor: 'white',
      color: 'black',
    },
    saveButton: {
      alignContent: 'center',
      alignSelf: 'center',
      paddingVertical: 15
    }
  });
Using Contact package to save contact info
npm install react-native-contacts --save
react-native link
Add kit specific “permission” keys to your Xcode Info.plist file, in order to make requestPermission work. Otherwise your app crashes when requesting the specific permission.
npm install react-native-contacts --save
react-native link
Add kit specific “permission” keys to your Xcode Info.plist file, in order to make requestPermission work. Otherwise your app crashes when requesting the specific permission.
Open Xcode > open ios/yourApp.xcodeproj > Info.plist > Add key Privacy - Contacts Usage Description with your kit specific permission. The value for the key is optional in development. If you submit to the App Store the value must explain why you need this permission.
  saveContact() {
      let contact = this.state.contact

      if (contact.givenName == null || contact.phoneNumbers.length == 0) {
        alert('Select at least an option for Name and Phone')
      } else {
        Contacts.openContactForm(this.state.contact, (err) => {
          if (err) {
            alert('Select an option')
          }
          this.props.navigation.navigate('ContactScreen', { text: this.state.lines })
        })
      }
    }
And we are done!


